
記事内に設置できるはてなブログっぽいシンプルなアマゾン商品リンクを作ったのでご紹介。
画像リンクとテキストリンクをコピペしてHTMLの中に貼るだけなので簡単。
Cocoon以外でも記事書くときに、HTMLも書けるタイプのブログなら使えます。
アマゾンアソシエイトに登録したけど販売実績なくて、Amazon Product Advertising APIが使えない自分みたいな人向けの記事となります。
見本


自分のブログに馴染むようにシンプルにしています。
カスタマイズする場合はCSSにコメント(/*ここ*/)があるので参考にしてください。
「カスタマイズ例」の項目で何個かカスタムしたCSSを載せたのでそちらも参考どうぞ!
設置方法
スタイルシートにCSSをコピペする
/************************************
** 自作アマゾン広告
************************************/
.amazon_box {
	padding: 16px; /* 枠の余白 */
      border: 1px solid #e7e5e5; /* 枠線 */
      display: flex;
}
.amazon_box .fa {
	display: none;
}
.amazon_box_img {
	margin: 0 !important;
}
.amazon_box_img img {
	display: none;
}
.amazon_box_img a img {
	display: inline-block;
	margin-bottom: 0;
}
.amazon_info {
	width: 100%;
        padding-left: 3%;
        margin: auto 0 auto;
}
.amazon_info p {
	margin: 0;
        line-height: 1.6;
}
/* 商品タイトル */
.amazon_info p a {
	text-decoration: none;
        transition: all .3s;
        color: #5E5BDD; /* 商品名の文字の色 */
        font-weight: 700; /* 商品名の文字の太さ */
}
.amazon_info p a:hover {
	text-decoration: underline;
}
/* ボタン */
a.amazon_info_button {
        text-decoration: none;
        transition: all .3s;
        display: block;
        text-align: center;
        padding: 8px; /* ボタンの余白 */
        background: #f4f4f4; /* ボタンの背景色 */
        color: #5E5BDD; /* ボタンの文字の色 */
        font-size: 14px; /* ボタンの文字の大きさ */
        font-weight: 700; /* ボタンの文字の太さ */
        margin-top: 16px; /* ボタンと商品名の間の余白 */
}
a.amazon_info_button:hover {
       background: #5E5BDD; /* カーソルを乗せた時のボタンの背景色 */
       color: #fff; /* カードルを乗せた時のボタンの文字の色 */
}
上記のCSSをスタイルシートにコピペしてください。
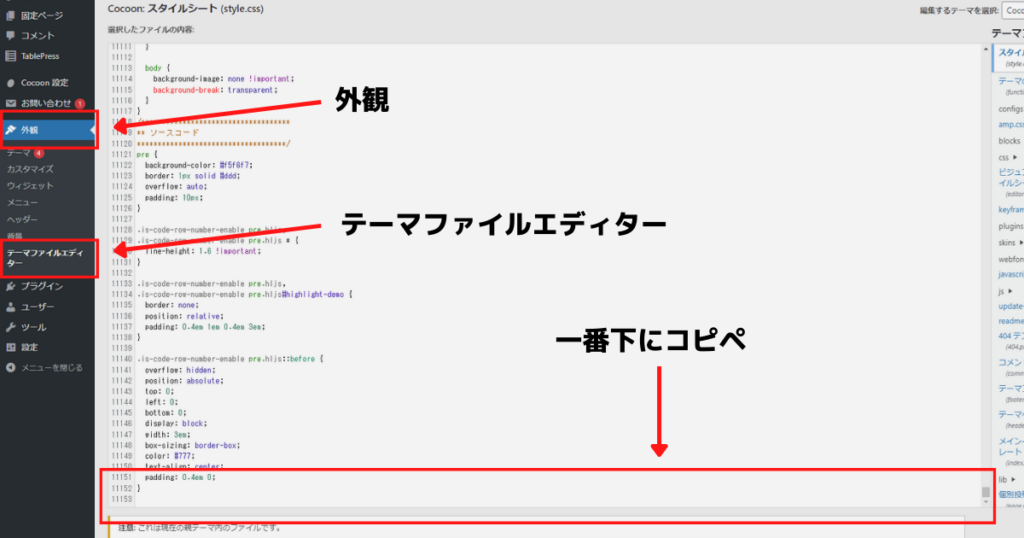
スタイルシートはワードプレスのダッシュボードから外観→テーマファイルエディターで開けます。
わかりやすいように一番下にコピペするのがおすすめです。
わからない方は下の項目の「実際に設置してみる」を参考にしてください。
記事に広告用のHTMLをコピペで設置
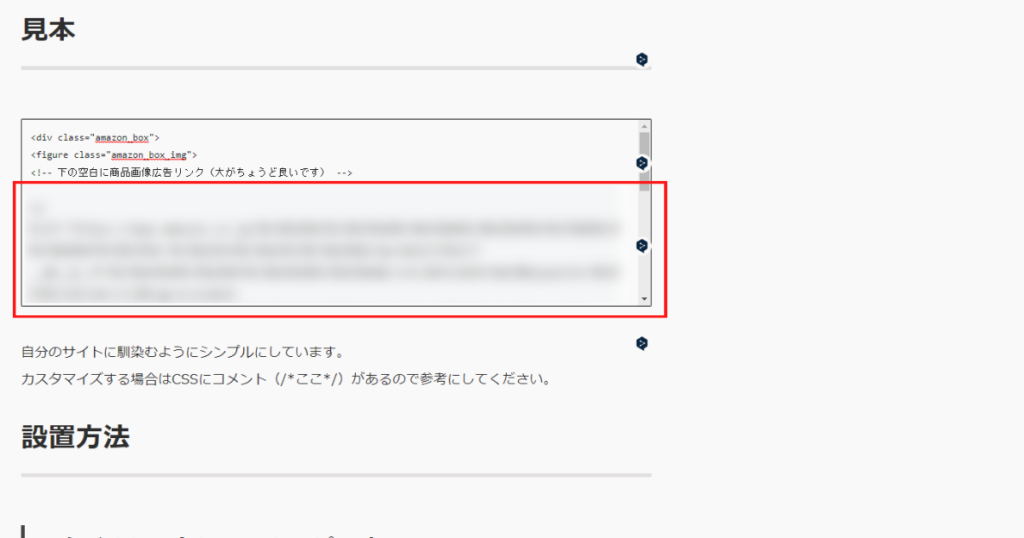
<div class="amazon_box">
<figure class="amazon_box_img">
<!-- 下の空白に商品画像広告リンク(大がちょうど良いです) -->
</figure>
<div class="amazon_info">
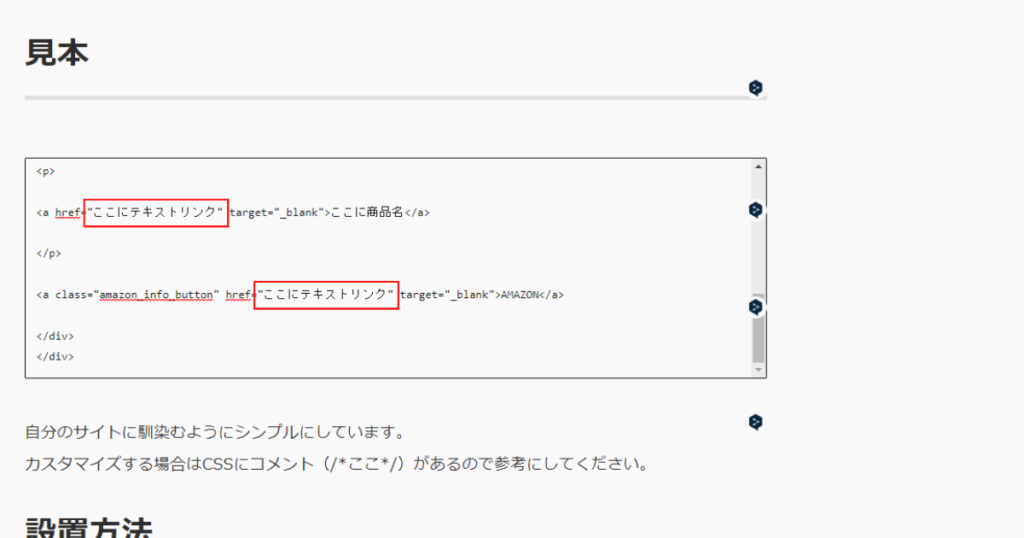
<p>
<a href="ここにテキストリンク" target="_blank">ここに商品名</a>
</p>
<a class="amazon_info_button" href="ここにテキストリンク" target="_blank">AMAZON</a>
</div>
</div>広告の設置は記事内の目的の場所にカスタムHTMLを追加して、その中に上のHTMLを入れてください。
コピペしたHTMLの<!– 下の空白に~ –>の下の空白に画像リンク大を、「ここにテキストリンク」にテキストリンクをコピペしてください。
テキストリンクはコピペする場所が2箇所あるのでご注意を。
最後に「ここに商品名」に商品名をコピペして完成です。
わからない方は下の項目の「実際に設置してみる」を参考にしてください。
カスタマイズ例
そのまま使っても味気がないと思うので何個かカスタマイズしたものを載せてみます。
汎用
/************************************
** 自作アマゾン広告
************************************/
.amazon_box {
    padding: 16px; /* 枠の余白 */
    border-radius: 3px; /* 枠の角の大きさ */
    border: 1px solid #cdc9c9; /* 枠線 */
    display: flex;
}
.amazon_box .fa {
    display: none;
}
.amazon_box_img {
    margin: 0 !important;
    box-shadow: 0px 1px 6px rgb(0 0 0 / 8%); /* 画像リンクの影 */
}
.amazon_box_img img {
    display: none;
}
.amazon_box_img a {
    transition: all .3s;
}
.amazon_box_img a img {
    display: inline-block;
    margin-bottom: 0;
    transition: all .3s;
}
.amazon_info {
    width: 100%;
    padding-left: 3%;
    margin: auto 0 auto;
}
.amazon_info p {
    margin: 0;
    line-height: 1.6;
}
/* 商品タイトル */
.amazon_info p a {
    text-decoration: none;
    transition: all .3s;
    color: #ff9e51; /* 商品名の文字の色 */
    font-weight: 700; /* 商品名の文字の太さ */
}
.amazon_info p a:hover {
    text-decoration: underline; /* カーソルを乗せた時の下線 */
}
/* ボタン */
a.amazon_info_button {
    text-decoration: none;
    transition: all .3s;
    display: block;
    text-align: center;
    padding: 8px; /* ボタンの余白 */
    background: #ff9e51; /* ボタンの背景色 */
    color: #fff; /* ボタンの文字の色 */
    font-size: 14px; /* ボタンの文字の大きさ */
    font-weight: 700; /* ボタンの文字の太さ */
    margin-top: 16px; /* ボタンと商品名の間の余白 */
    border-radius: 3px; /* ボタン角の大きさ */
    border-bottom: 1px solid rgb(0 0 0 / 12%); /* ボタン下線 */
    text-shadow: 0px 0px 3px rgb(0 0 0 / 12%); /* 文字の影 */
}
a.amazon_info_button:hover {
    background: #FFAA32; /* カーソルを乗せた時のボタンの背景色 */
    color: #fff; /* カーソルを乗せた時のボタンの文字の色 */
}
よく見かける感じの広告リンクです。
どのブログでもそれなりに馴染むと思います。
すべて中央に配置
/************************************
** 自作アマゾン広告
************************************/
.amazon_box {
    padding: 20px; /* 枠の余白 */
    background: #f7f7f7; /* 背景色 */
}
.amazon_box .fa {
    display: none;
}
.amazon_box_img {
    margin: 0 !important;
    display: flex;
}
.amazon_box_img img {
    display: none;
}
.amazon_box_img a {
    transition: all .3s;
    margin: 0 auto;
}
.amazon_box_img a img {
    display: inline-block;
    margin-bottom: 0;
}
.amazon_info {
    width: 100%;
	margin-top: 12px; /* 画像と商品名の余白 */
}
.amazon_info p {
    margin: 0;
    line-height: 1.6;
    text-align: center;
}
/* 商品タイトル */
.amazon_info p a {
    text-decoration: none;
    transition: all .3s;
    color: #444; /* 商品名の文字の色 */
    font-weight: 700; /* 商品名の文字の太さ */
    font-size: 20px; /* 商品名の文字の大きさ */
}
.amazon_info p a:hover {
    color: #999; /* カーソルを乗せた時の商品タイトルの文字の色 */
}
/* ボタン */
a.amazon_info_button {
    text-decoration: none;
    transition: all .3s;
    display: block;
    text-align: center;
    padding: 16px; /* ボタンの余白 */
    background: #5E5BDD; /* ボタンの背景色 */
    color: #fff; /* ボタンの文字の色 */
    font-size: 14px; /* ボタンの文字の大きさ */
    font-weight: 700; /* ボタンの文字の太さ */
    margin-top: 24px; /* ボタンと商品名の間の余白 */
    border-radius: 30px; /* ボタンの角の大きさ */
}
a.amazon_info_button:hover {
    background: #999; /* カーソルを乗せた時のボタンの背景色 */
    color: #fff; /* カーソルを乗せた時のボタンの文字の色 */
}
すべて中央に配置した広告リンクです。
ちょっと大きめなので記事中に使うより記事の終わりに使うと良いと思います。
ボタンを追加
<div class="amazon_box">
<figure class="amazon_box_img">
<!-- 下の空白に商品画像広告リンク(大がちょうど良いです) -->

</figure>

<div class="amazon_info">
<p>

<a href="ここにテキストリンク" target="_blank">ここに商品名</a>

</p>

<!-- 1つ目のボタン -->
<a class="amazon_info_button" href="ここにテキストリンク" target="_blank">AMAZON</a>
<!-- 2つ目ボタン -->
<a class="amazon_info_button" href="ここにテキストリンク" target="_blank">ボタン2</a>

</div>
</div>/* 2つ目のボタン */
.amazon_info a.amazon_info_button:last-child {
}ボタンを2つにしたカスタマイズです。
2つにする場合は上のHTMLを使ってください。
カスタマイズする場合は上のCSSを追加して記述してください。
実際に設置してみる
CSSをコピペして貼り付けよう
/************************************
** 自作アマゾン広告
************************************/
.amazon_box {
	padding: 16px; /* 枠の余白 */
      border: 1px solid #e7e5e5; /* 枠線 */
      display: flex;
}
.amazon_box .fa {
	display: none;
}
.amazon_box_img {
	margin: 0 !important;
}
.amazon_box_img img {
	display: none;
}
.amazon_box_img a img {
	display: inline-block;
	margin-bottom: 0;
}
.amazon_info {
	width: 100%;
        padding-left: 3%;
        margin: auto 0 auto;
}
.amazon_info p {
	margin: 0;
        line-height: 1.6;
}
/* 商品タイトル */
.amazon_info p a {
	text-decoration: none;
        transition: all .3s;
        color: #5E5BDD;  /* 商品名の文字の色 */
        font-weight: 700; /* 商品名の文字の太さ */
}
.amazon_info p a:hover {
	text-decoration: underline;
}
/* ボタン */
a.amazon_info_button {
        text-decoration: none;
        transition: all .3s;
        display: block;
        text-align: center;
        padding: 8px; /* ボタンの余白 */
        background: #f4f4f4; /* ボタンの背景色 */
        color: #5E5BDD; /* ボタンの文字の色 */
        font-size: 14px; /* ボタンの文字の大きさ */
        font-weight: 700; /* ボタンの文字の太さ */
        margin-top: 16px; /* ボタンと商品名の間の余白 */
}
a.amazon_info_button:hover {
       background: #5E5BDD; /* カーソルを乗せた時のボタンの背景色 */
       color: #fff; /* カードルを乗せた時のボタンの文字の色 */
}
最初に準備として上のCSSをスタイルシートに記述しましょう。
まずは、画像のようにワードプレスのダッシュボードから外観→テーマファイルエディターを選びます。
選ぶとスタイルシートの画面に移りますので、スタイルシートの一番下までスクロールして空いてる空欄にCSSをコピペして準備完了です。
記事の中に設置してみよう
では記事の中に広告を配置してみましょう。
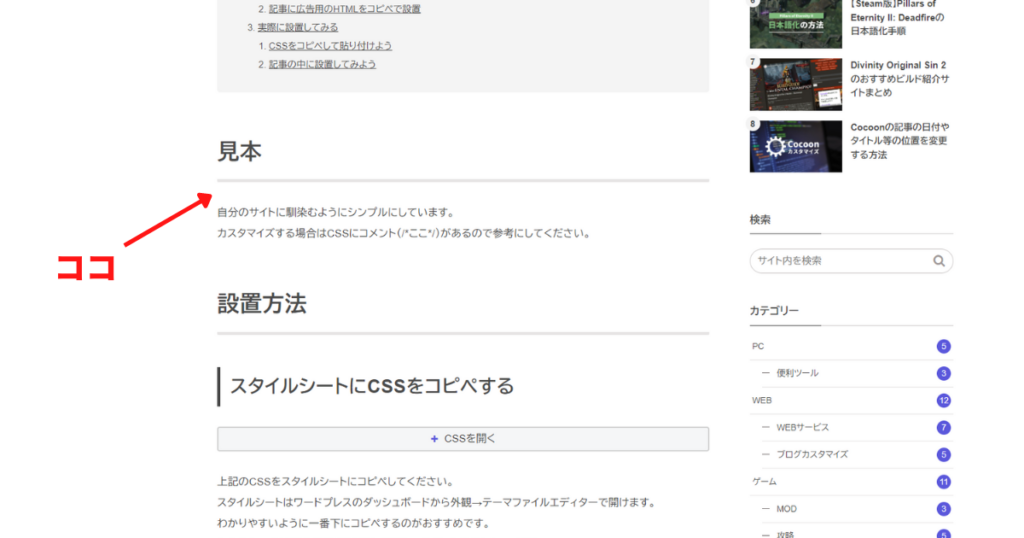
今回はこの記事の見出し「見本」の下に広告を設置したいと思います。
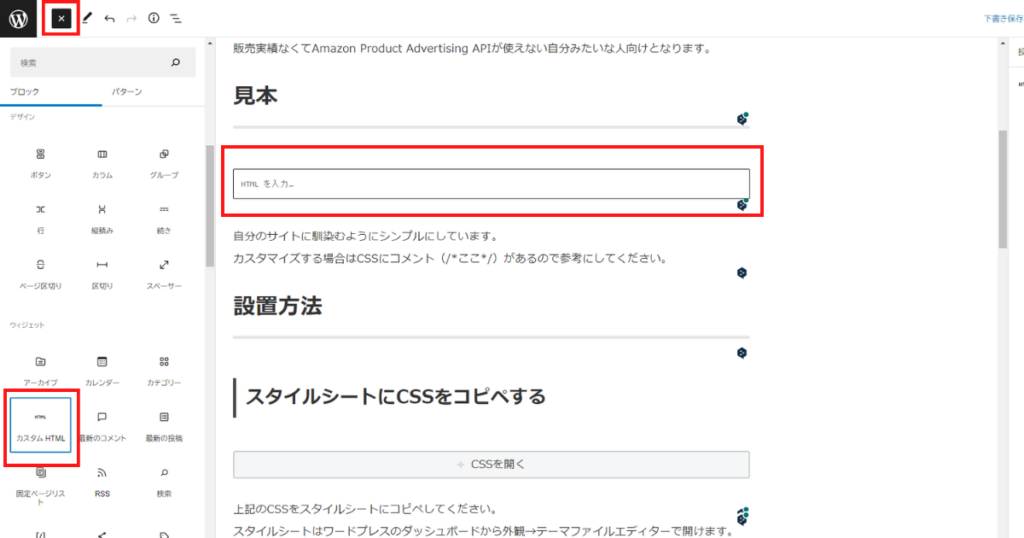
記事の編集画面を開いて広告を配置したい場所にカスタムHTMLを設置してください。
カスタムHTMLは左上のブロック挿入ボタンからメニューを開いた先のウィジェットの項目にあります。

<div class="amazon_box">
<figure class="amazon_box_img">
<!-- 下の空白に商品画像広告リンク(大がちょうど良いです) -->

</figure>

<div class="amazon_info">
<p>

<a href="ここにテキストリンク" target="_blank">ここに商品名</a>

</p>

<a class="amazon_info_button" href="ここにテキストリンク" target="_blank">AMAZON</a>

</div>
</div>
カスタムHTMLを設置したら上の商品リンク用のHTMLをカスタムHTMLの中にコピペしてください。
次は、このHTMLの中にアマゾンの画像リンク・テキストリンク・商品名の3つを配置していきます。
載せたい商品のアマゾンのページに移りましょう。
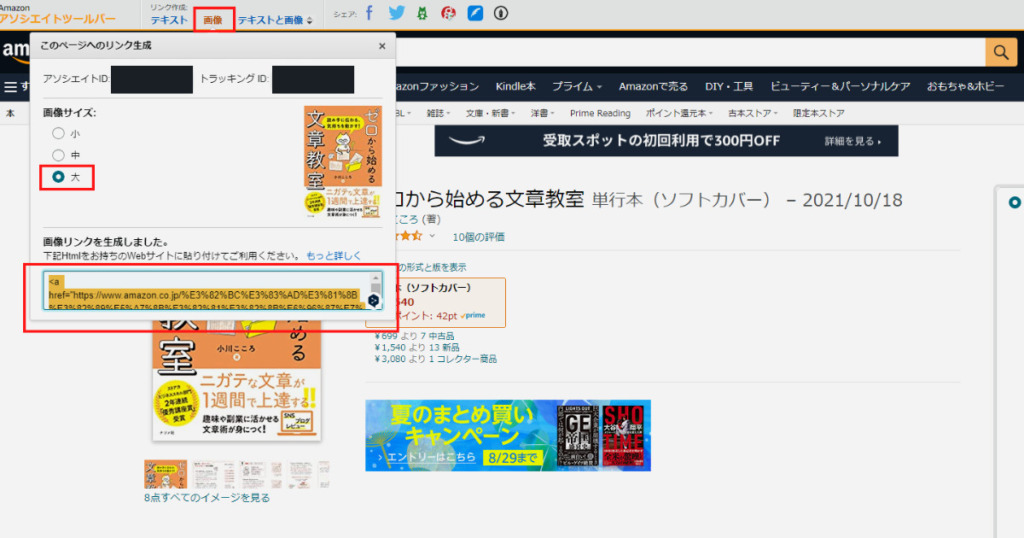
商品ページの上部にあるアマゾンアソシエイトツールバーから画像を選択します。
画像のサイズは大を選んで生成した画像リンクをコピーします。
<div class="amazon_box">
<figure class="amazon_box_img">
<!-- 下の空白に商品画像広告リンク(大がちょうど良いです) -->
<a href="**************************"_blank"><img border="0" src="*****************************"></a><img src="***********************************" width="1" height="1" border="0" alt="" style="border:none !important; margin:0px !important;">
</figure>

<div class="amazon_info">
<p>

<a href="ここにテキストリンク" target="_blank">ここに商品名</a>

</p>

<a class="amazon_info_button" href="ここにテキストリンク" target="_blank">AMAZON</a>

</div>
</div>
コピーした画像リンクをさきほどのHTMLの中にペーストします。
ペーストする場所は<!– 下の空白に商品画像~ –>の下の空白の場所です。
上のHTMLをようになっていれば大丈夫です。
「*」の場所は個人情報かもしれないので一応消しています。
次はテキストリンクを上の画像ような「ここにテキストリンク」の2箇所にコピペします。
載せたい商品のアマゾンのページに移ります。
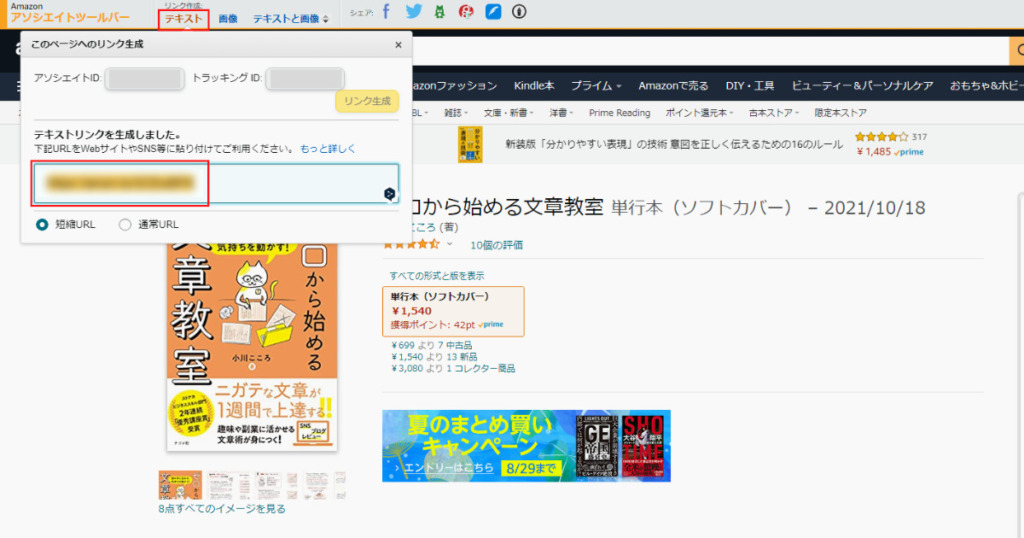
商品ページの上部にあるアマゾンアソシエイトツールバーからテキストを選択します。
短縮URLでも通常URLでもどちらでもいいので生成されたテキストリンクをコピーします。
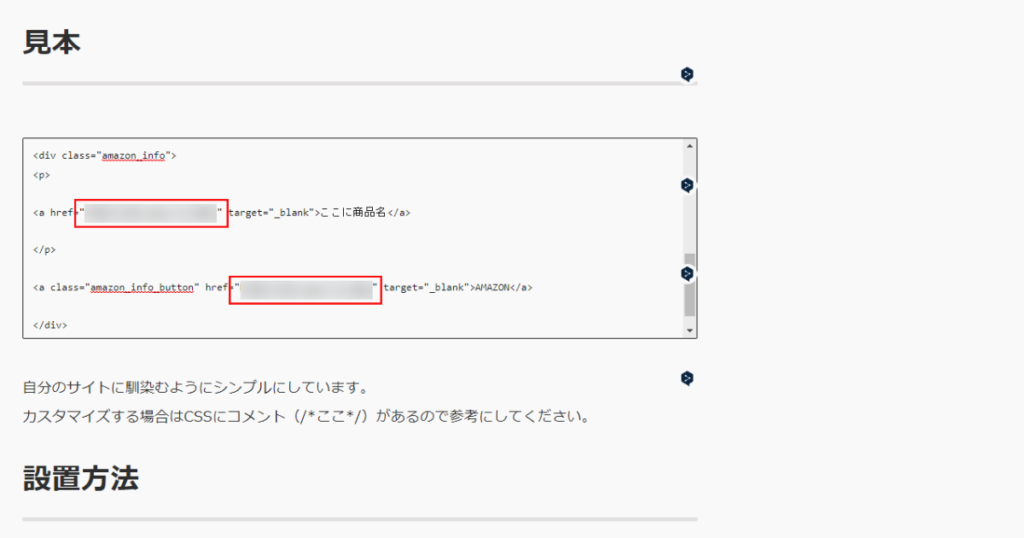
<div class="amazon_box">
<figure class="amazon_box_img">
<!-- 下の空白に商品画像広告リンク(大がちょうど良いです) -->
<a href="**************************"_blank"><img border="0" src="*****************************"></a><img src="***********************************" width="1" height="1" border="0" alt="" style="border:none !important; margin:0px !important;">
</figure>

<div class="amazon_info">
<p>

<a href="https://amzn.to/*******" target="_blank">ここに商品名</a>

</p>

<a class="amazon_info_button" href="https://amzn.to/*******" target="_blank">AMAZON</a>

</div>
</div>「ここにテキストリンク」の文章は消して必ず「”」の間にテキストリンクを入れてください。
上のHTMLのようになっていれば大丈夫です。
画像リンクと同じく「*」の場所は個人情報かもしれないので一応消しています。
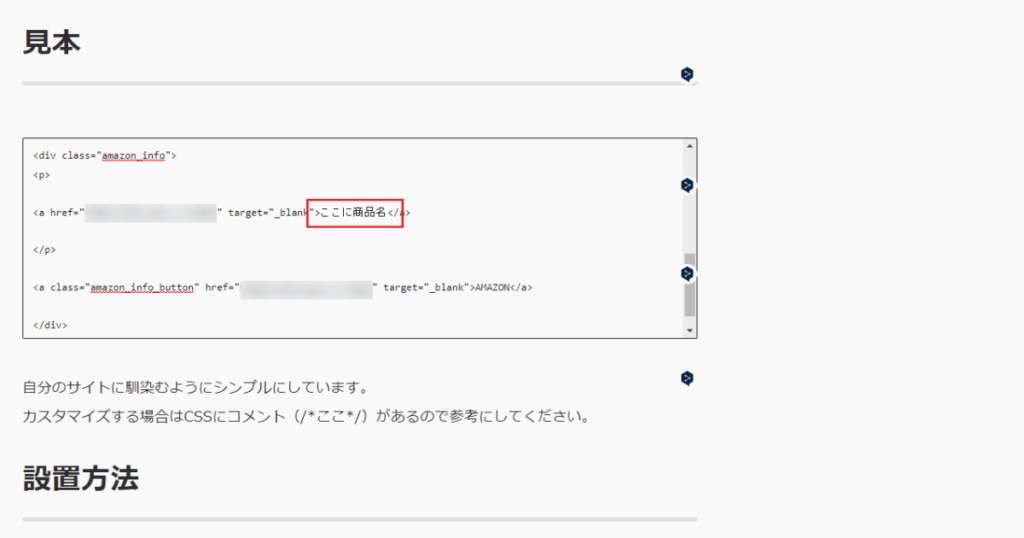
最後に「ここに商品名」の箇所に商品名を入れましょう。
載せたい商品のアマゾンのページに移ります。
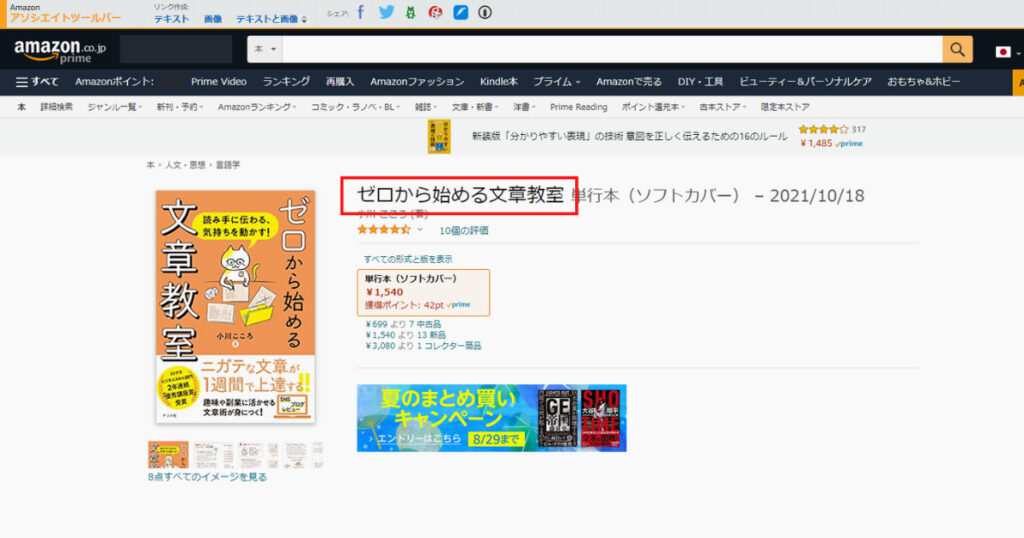
ただ商品名をコピーするだけOKです。
<div class="amazon_box">
<figure class="amazon_box_img">
<!-- 下の空白に商品画像広告リンク(大がちょうど良いです) -->
<a href="**************************"_blank"><img border="0" src="*****************************"></a><img src="***********************************" width="1" height="1" border="0" alt="" style="border:none !important; margin:0px !important;">
</figure>
<div class="amazon_info">
<p>
<a href="https://amzn.to/*******" target="_blank">ゼロから始める文章教室</a>
</p>
<a class="amazon_info_button" href="https://amzn.to/*******" target="_blank">AMAZON</a>
</div>
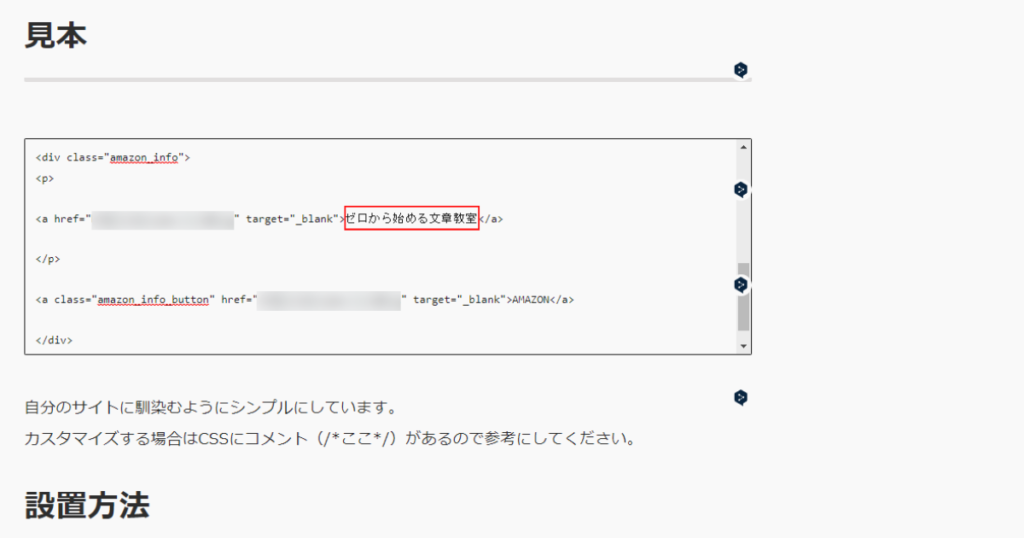
</div>「ここに商品名」という箇所を消して先程コピーした商品名をペーストします。
商品名は必ず「>」と「<」の間に入れてください。
上のHTMLのようになっていれば大丈夫です。
最後に確認しよう
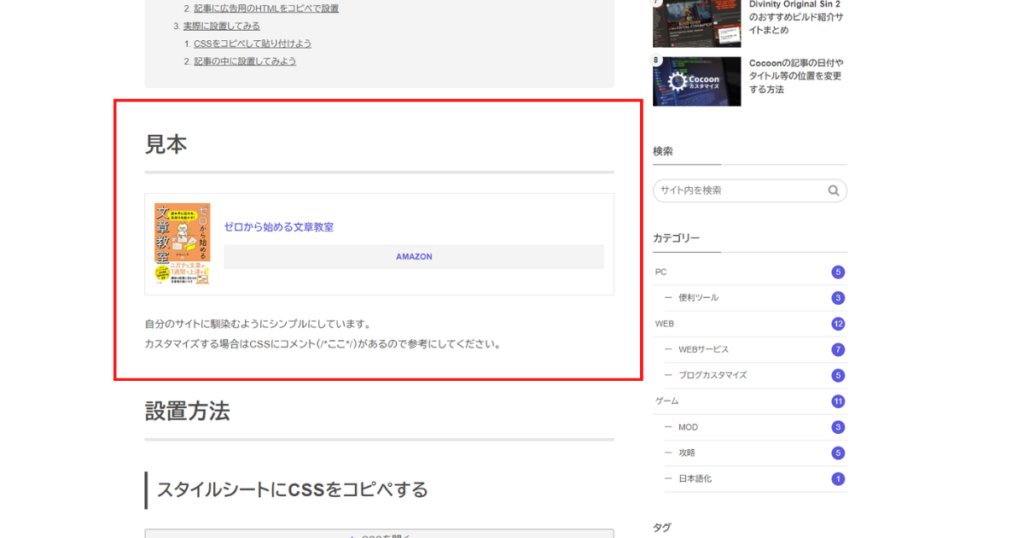
最後に実際の記事を見て確認しましょう。
問題がある場合は最初からやり直してみてください。
それでも正しく表示されない場合は、HTML・CSSに問題があるかもしれないのでお手数ですがコメントしてくださるとありがたいです。
以上、Amazon Product Advertising APIが使えない人のためのアマゾン商品リンクの作り方でした!

コメント